
Lila's Change Table Before and After.
Hey guys:)
As I had mentioned before, I have been on a repurpose kick with the existing things that I had in my home. I had made a pact to myself that if there wasn't a use, it was leaving the house. Let me tell you that this small minimalism "kick" that I have been on has made all the difference for me. I find its been easier to keep the house tidy, and less stress on me. Having said that, my original idea to buy all new for the baby's room went "buh-bye" when I really looked at the stuff I already had. Today I am showing you guys how I repurposed an old dresser that has lived in many places and rooms of my family's homes over the years. It has found a new home in Lila's room and we couldn't be happier with it.
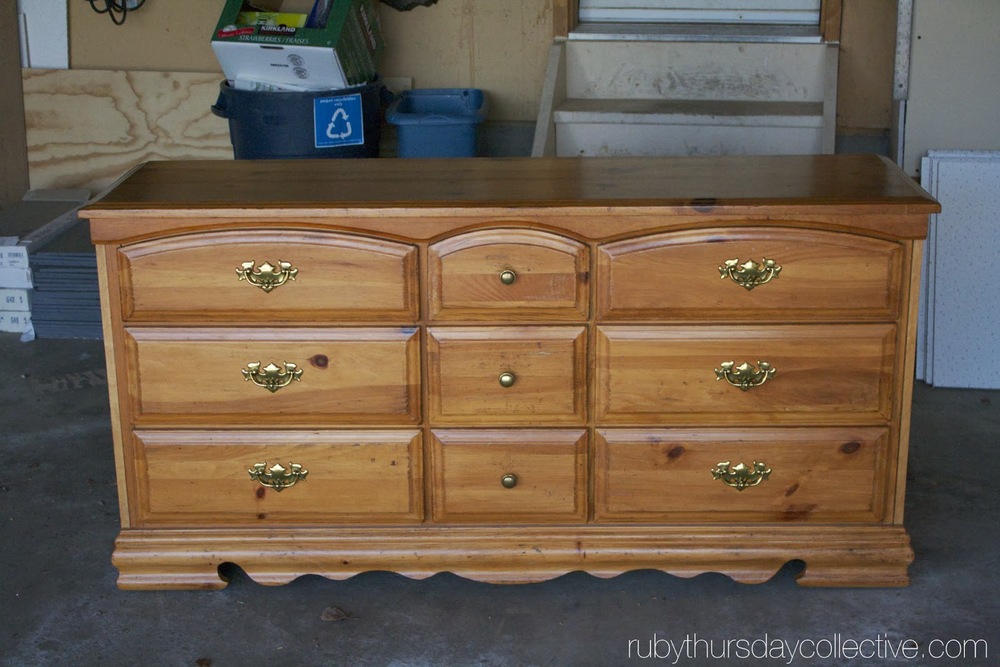
Here is what I did to take it from this:
To This:


For some finishing touches, I found some contact paper at Walmart and stuck it down to the bottom of each drawer for a cute and pretty finish. The handles were ones off an old vintage dresser turned vanity from my old house. I had kept them for the last 6 years and they fit perfectly! The knobs were off an old dresser that I got rid of. I purchased them about 5 years ago from Anthropologie. This project cost me about 30$ for paint and that's it! YAY!
Have a great day my friends!
xoxo
-L
As I had mentioned before, I have been on a repurpose kick with the existing things that I had in my home. I had made a pact to myself that if there wasn't a use, it was leaving the house. Let me tell you that this small minimalism "kick" that I have been on has made all the difference for me. I find its been easier to keep the house tidy, and less stress on me. Having said that, my original idea to buy all new for the baby's room went "buh-bye" when I really looked at the stuff I already had. Today I am showing you guys how I repurposed an old dresser that has lived in many places and rooms of my family's homes over the years. It has found a new home in Lila's room and we couldn't be happier with it.
Here is what I did to take it from this:
To This:
This will be the 3rd time it has gotten a make over and I am really happy with the results. This is how we pulled it off.
First, we took all of the hardware off and sanded down each drawer and the dresser itself. We used a palm sander with 220 grit sand paper.
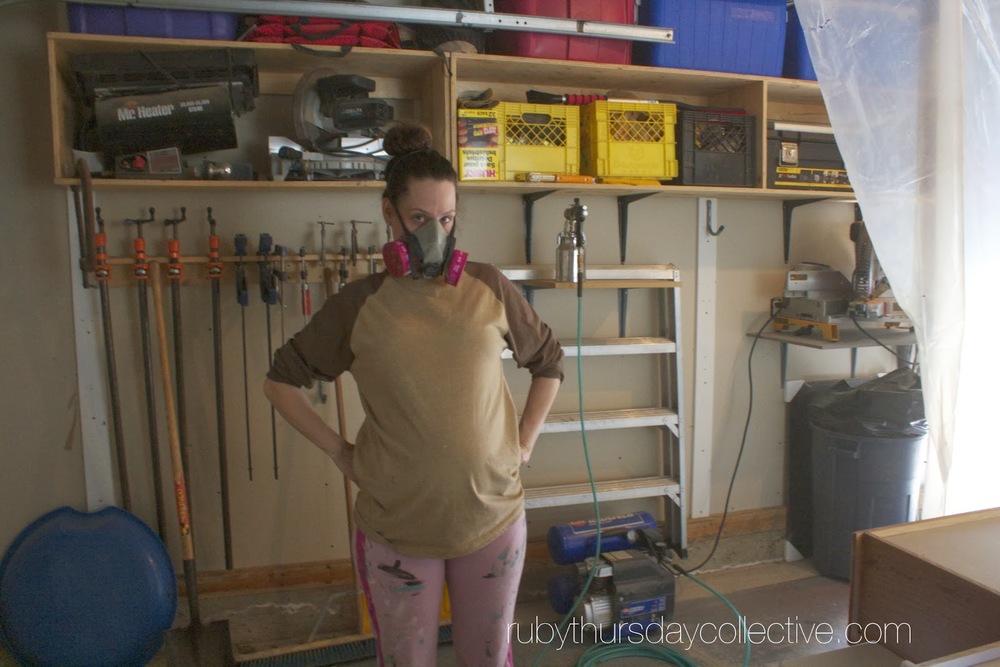
Next, we made a creepy horror movie space in our garage with some poly to protect everything else from the spraying that was taking place. We had to do it indoors because it was crazy windy that day. We primed everything with Krylon spray primer. That shiz is tha bomb. We did an even light coat for good adhering. I have mentioned this before but when you are using a spray primer, after it is dry, it's good to give it a light sand so it's super smooth. It gets a gritty finish when it has dried and sanding it just makes it feel like buttah. Again, I used a piece of 220 grit sandpaper and just smoothed it by hand.
So after that was dried, sanded and smoothed, we moved on to painting that dresser! We started off using this paint sprayer that my mom had but to be honest, it was AWFUL. It kept clogging and glopping and it was angering us. My next door neighbour heard us swearing and bleeping away and came over to offer us his sprayer that hooks up to a compressor. It has SO much control and was amazing to work with. Here I am painting away and loving life with my sexy mask a baby bump.
We used an oil based high gloss paint that is water soluble! It cleans like a dream and was great to work with. I picked some of that up at Benjamin Moore (of course. ha!). Another amazing thing about the paint sprayer is that when using such a fine mist with a sprayer, the colour is more even, spreads further and you use about a 1/3 of the paint. WIN WIN WIN! After we let it dry and cure for 24 hours we moved it into the nursery and yay! It was perfect:)
Have a great day my friends!
xoxo
-L